Rust Quickstart
TLDR: dist is a souped up version of
cargo buildwhich handles building tarballs and installers. It also knows how to generate Github CI for orchestrating itself and uploading its output to a new GitHub Release.This quickstart is a bit too quick because there's some important nuances to "announcing and building releases" that depend on the way you like to structure and version your workspace. We will blatantly ignore those nuances and show you the Happiest Happy Path (a workspace with one crate that defines a binary). Checkout the workspace guide for more details on what you should actually do.
Setup
Setting up just requires you to install dist and then run dist init in your Cargo workspace. This command interactively walks you through configuration options, and should be run again whenever you want to change your settings or want to update dist.
Just to really emphasize that: dist init is designed to be rerun over and over, and will preserve your settings while handling any necessary updates and migrations. Always Be Initing.
Initial Setup
Since this is a quickstart, we'll pass --yes to auto-accept all defaults on our first setup!
# setup dist in your project (--yes to accept defaults)
dist init --yes
git add .
git commit -am 'chore: wow shiny new dist CI!'
It's very common for dist init to return an error about the "repository" URLs set in your Cargo.toml. If this happens, no work will be lost. You can just follow the instructions in the error and rerun dist init again and it will pick up where you left off.**
This one-time setup will:
- create your dist config in
Cargo.toml - add a shippable build profile to your
Cargo.toml - generate CI for orchestrating itself in
.github/workflows/release.yml
Adding Installers
The most common reason to update dist or mess with its config is to add a new installer, which is basically our blanket term for anything more fancy than tarballs (curl-sh scripts, npm packages, msi installers, ...).
You can skip this step for now and just test out the basics the initial setup gives you. Each individual installer should have a guide that assumes you did the initial setup.
The tl;dr of those guides is "run dist init again, select the installer you want to add, and fill in any extra details that are needed".
Test It Out
There are a several ways to test out dist before committing to running a proper release:
- build for the current platform (
dist build) - check what CI will build (
dist plan) - check the release process on pull-requests
Build For The Current Platform
dist build
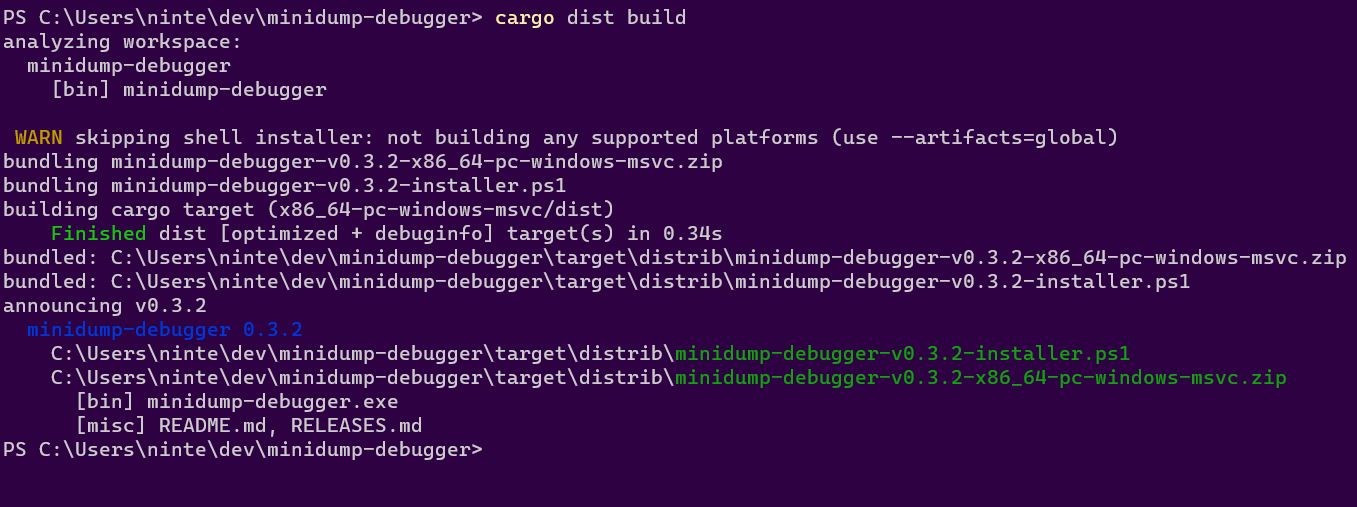
The build command will by default try to build things for the computer you're running it on. So if you run it on linux you might get a tar.xz containing your binary and an installer.sh, but if you run it on windows you might get a zip and an installer.ps1.
dist will then spit out paths to the files it created, so you can inspect their contents and try running them (note that installer scripts probably won't be locally runnable, because they will try to fetch their binaries from GitHub).
Check What CI Will Build
dist plan
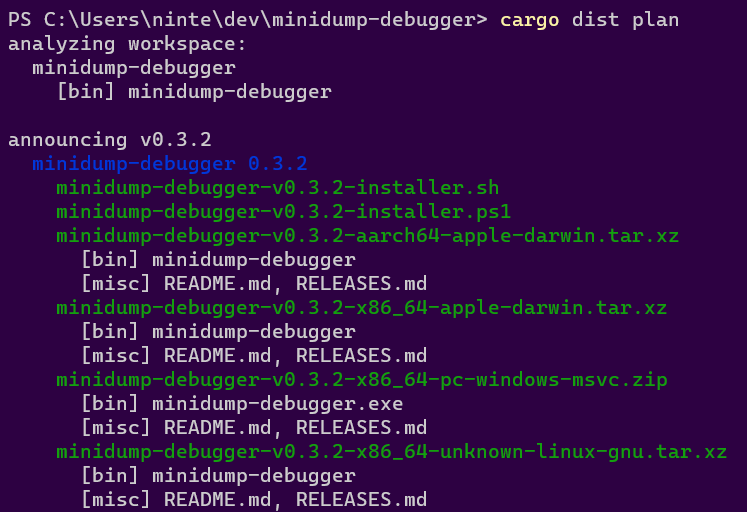
The plan command should be running the exact same logic that dist's generated CI will run, but without actually building anything. This lets you quickly check what cutting a new release will produce. It will also try to catch any inconsistencies that could make the CI error out.
Check The Release Process On Pull-Requests
By default we run the "plan" step of your release CI on every pull-request so that we can catch breakage to your release process as early as possible. This will work even for a pull-request that sets up dist for the first time, so you can be confident you're landing something that works.
You can also crank this up by setting pr-run-mode = "upload", which will run all the build steps as well, and upload the results to the PR's Workflow Summary as an "artifacts.zip". This is great for making sure the windows build works even if you only have a linux machine, or vice-versa. Although you should probably only keep it on temporarily, as it's very slow and wasteful to build all those shippable artifacts for every PR.
Cut A Release (Trigger Github CI)
dist largely doesn't care about the details of how you prepare your release, and doesn't yet provide tools to streamline it. All it cares about is you getting your release branch into the state you want, and then pushing a properly formatted git tag like "v0.1.0". Here's a super bare-bones release process where we're releasing by just pushing a bunch of stuff to main branch (but it would work just as well with PRs and release branches):
# <manually update the version of your crate, run tests, etc>

# commit and push to main (can be done with a PR)
git commit -am "release: version 0.1.0"
git push

# actually push the tag up (this triggers dist's CI)
git tag v0.1.0
git push --tags

# publish to crates.io (optional)
cargo publish
The important parts are that you update the crates you want to release/announce to the desired version and push a git tag with that version.
At this point you're done! The generated CI script should pick up the ball and create a Github Release with all your builds over the next few minutes!